DIY Installation Tips for Stainless Steel Utility Sinks
- Share
- publisher
- Samsink plus
- Issue Time
- Oct 14,2025
Summary
This guide provides comprehensive DIY instructions for installing a stainless steel utility sink.it covers essential pre-installation planing,a step-by-step process mounting to plumbing connections, and solutions for common challenges like leaks or misalignment By following the detailed steps, using the right tools,and adhering to safety protocols you can achieve a professional-grade installation that enhances functionality in laundry rooms, garages, or workshops for years to come.
Installing a stainless steel utility sink can transform your laundry room, garage, or workshop into a highly functional space. Proper installation guarantees durability, optimal performance, and a professional finish. Our comprehensive guide provides step-by-step instructions, expert tips, and detailed insights to help you undertake this project confidently and efficiently.
Understanding the Components of a Stainless Steel Utility Sink
Before beginning installation, familiarize yourself with the key components involved:
-1.Sink Basin: Made of durable stainless steel, designed to withstand heavy use.
-2.Mounting Brackets: Secure the sink to the wall or base cabinet.
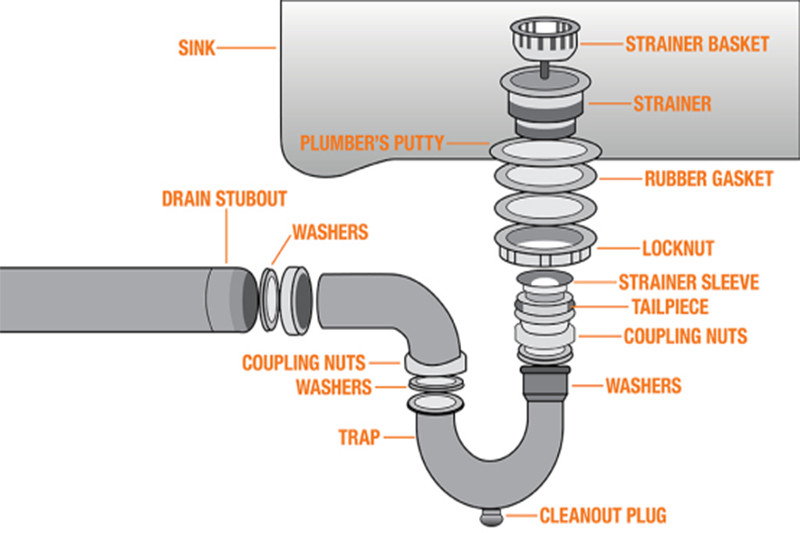
-3.Drain Assembly: Includes the drain flange, strainer, and tailpiece.
-4.Faucet and Water Supply Lines: Connect to your existing plumbing.
-5.P-Trap and Venting: Essential for proper drainage and odor control.
-6.Support Frame or Pedestal: Provides stability, especially for freestanding models.
Having a thorough understanding of these parts ensures smoother assembly and troubleshooting during installation.
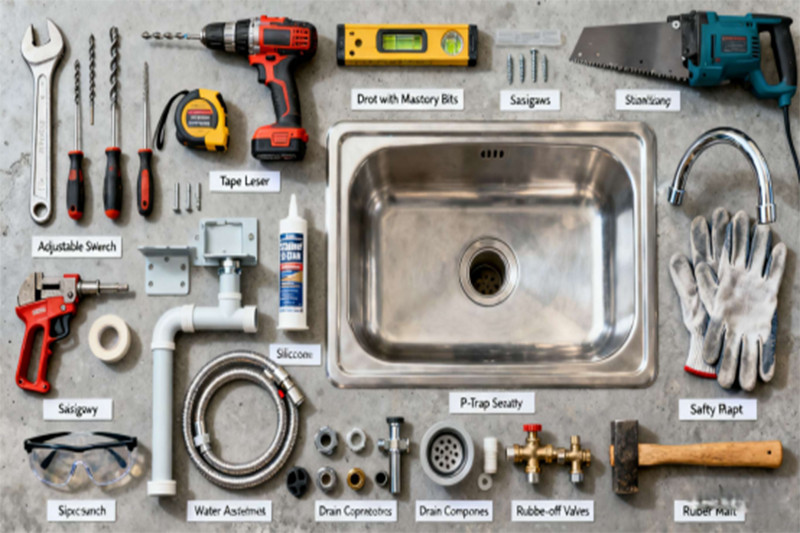
Tools and Materials Required for DIY Stainless Steel Sink Installation
Gathering the right tools and materials is vital for a seamless installation process:
| Tools | Materials |
| Adjustable wrench | Stainless steel sink |
| Drill with masonry and drill bits | Mounting brackets and hardware |
Level | Silicone sealant or plumber’s putty |
Tape measure | Water supply connectors |
Jigsaw or reciprocating saw (if cutting is needed) | P-trap assembly |
| Screwdriver | Flexible faucet hoses |
Pipe wrench | Drain assembly components |
Plumber’s tape (Teflon tape) | Shut-off valves (if replacing) |
Safety goggles and gloves | Rubber mallet (optional) |
Proper preparation minimizes delays and ensures safety during installation.
Pre-Installation Planning and Measurements
Accurate measurements and planning are the foundation of a successful installation:
-Determine the Location: Choose a spot with adequate space, proper drainage access, and proximity to water supply lines.
-Measure the Sink Opening: Confirm the sink's dimensions against the mounting area, ensuring it fits comfortably.
-Check Plumbing Connections: Verify existing water supply and drain pipe configurations.
-Prepare the Wall or Base: Ensure the surface is sturdy, level, and suitable for mounting.
-Tip: Use a level to mark the exact position for mounting brackets, ensuring the sink sits perfectly horizontal.
Step-by-Step Guide for Installing a Stainless Steel Utility Sink
1. Turn Off Water Supply and Prepare the Area
-Shut off the main water supply or individual shut-off valves.
-Open existing faucets to drain residual water.
-Clear the workspace and protect surfaces with drop cloths.
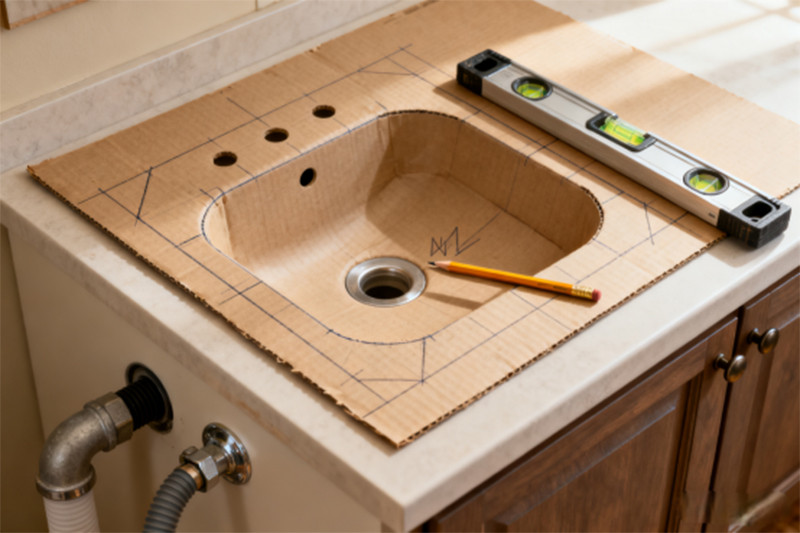
2. Mark the Mounting Area
-Use the sink's template (usually provided) to mark the mounting holes on the wall or cabinet.
-Confirm the measurements align with plumbing access points.
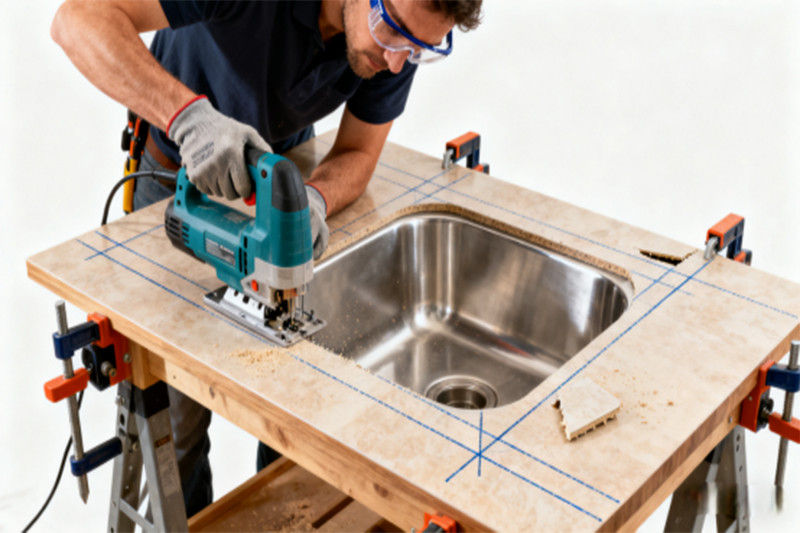
3. Cut Openings if Necessary
-If installing into a countertop or cabinet, cut the opening using a jigsaw or reciprocating saw.
-Smooth edges with a file or sandpaper.
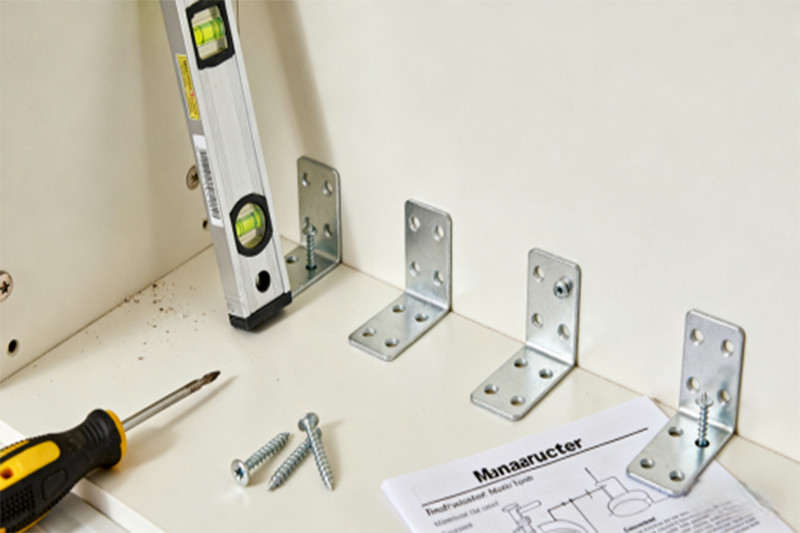
4. Install Mounting Brackets
-Attach the mounting brackets to the wall or cabinet as per manufacturer instructions.
-Use a level to ensure brackets are aligned horizontally.
-Secure brackets with appropriate anchors or screws.
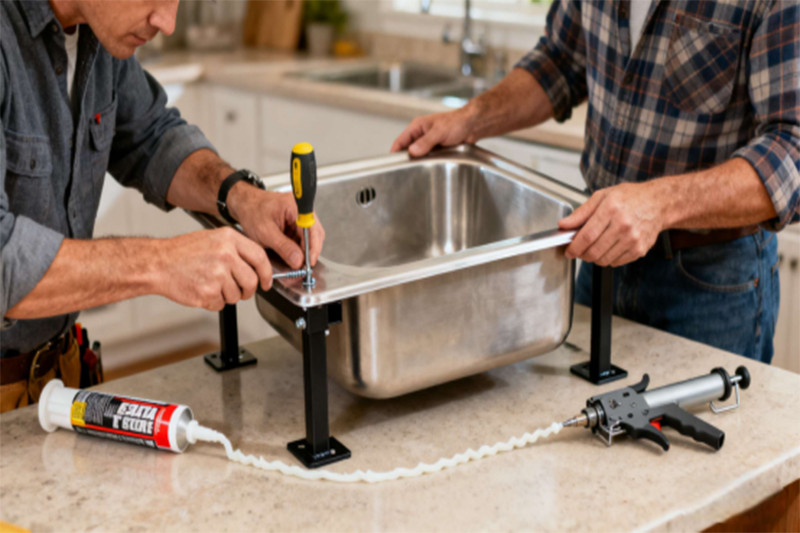
5. Position and Secure the Sink
-Carefully lift the sink into place, aligning it with the mounting brackets.
-Use screws to secure the sink to the brackets, ensuring a tight fit.
-Apply a bead of silicone sealant around the edge to prevent water seepage
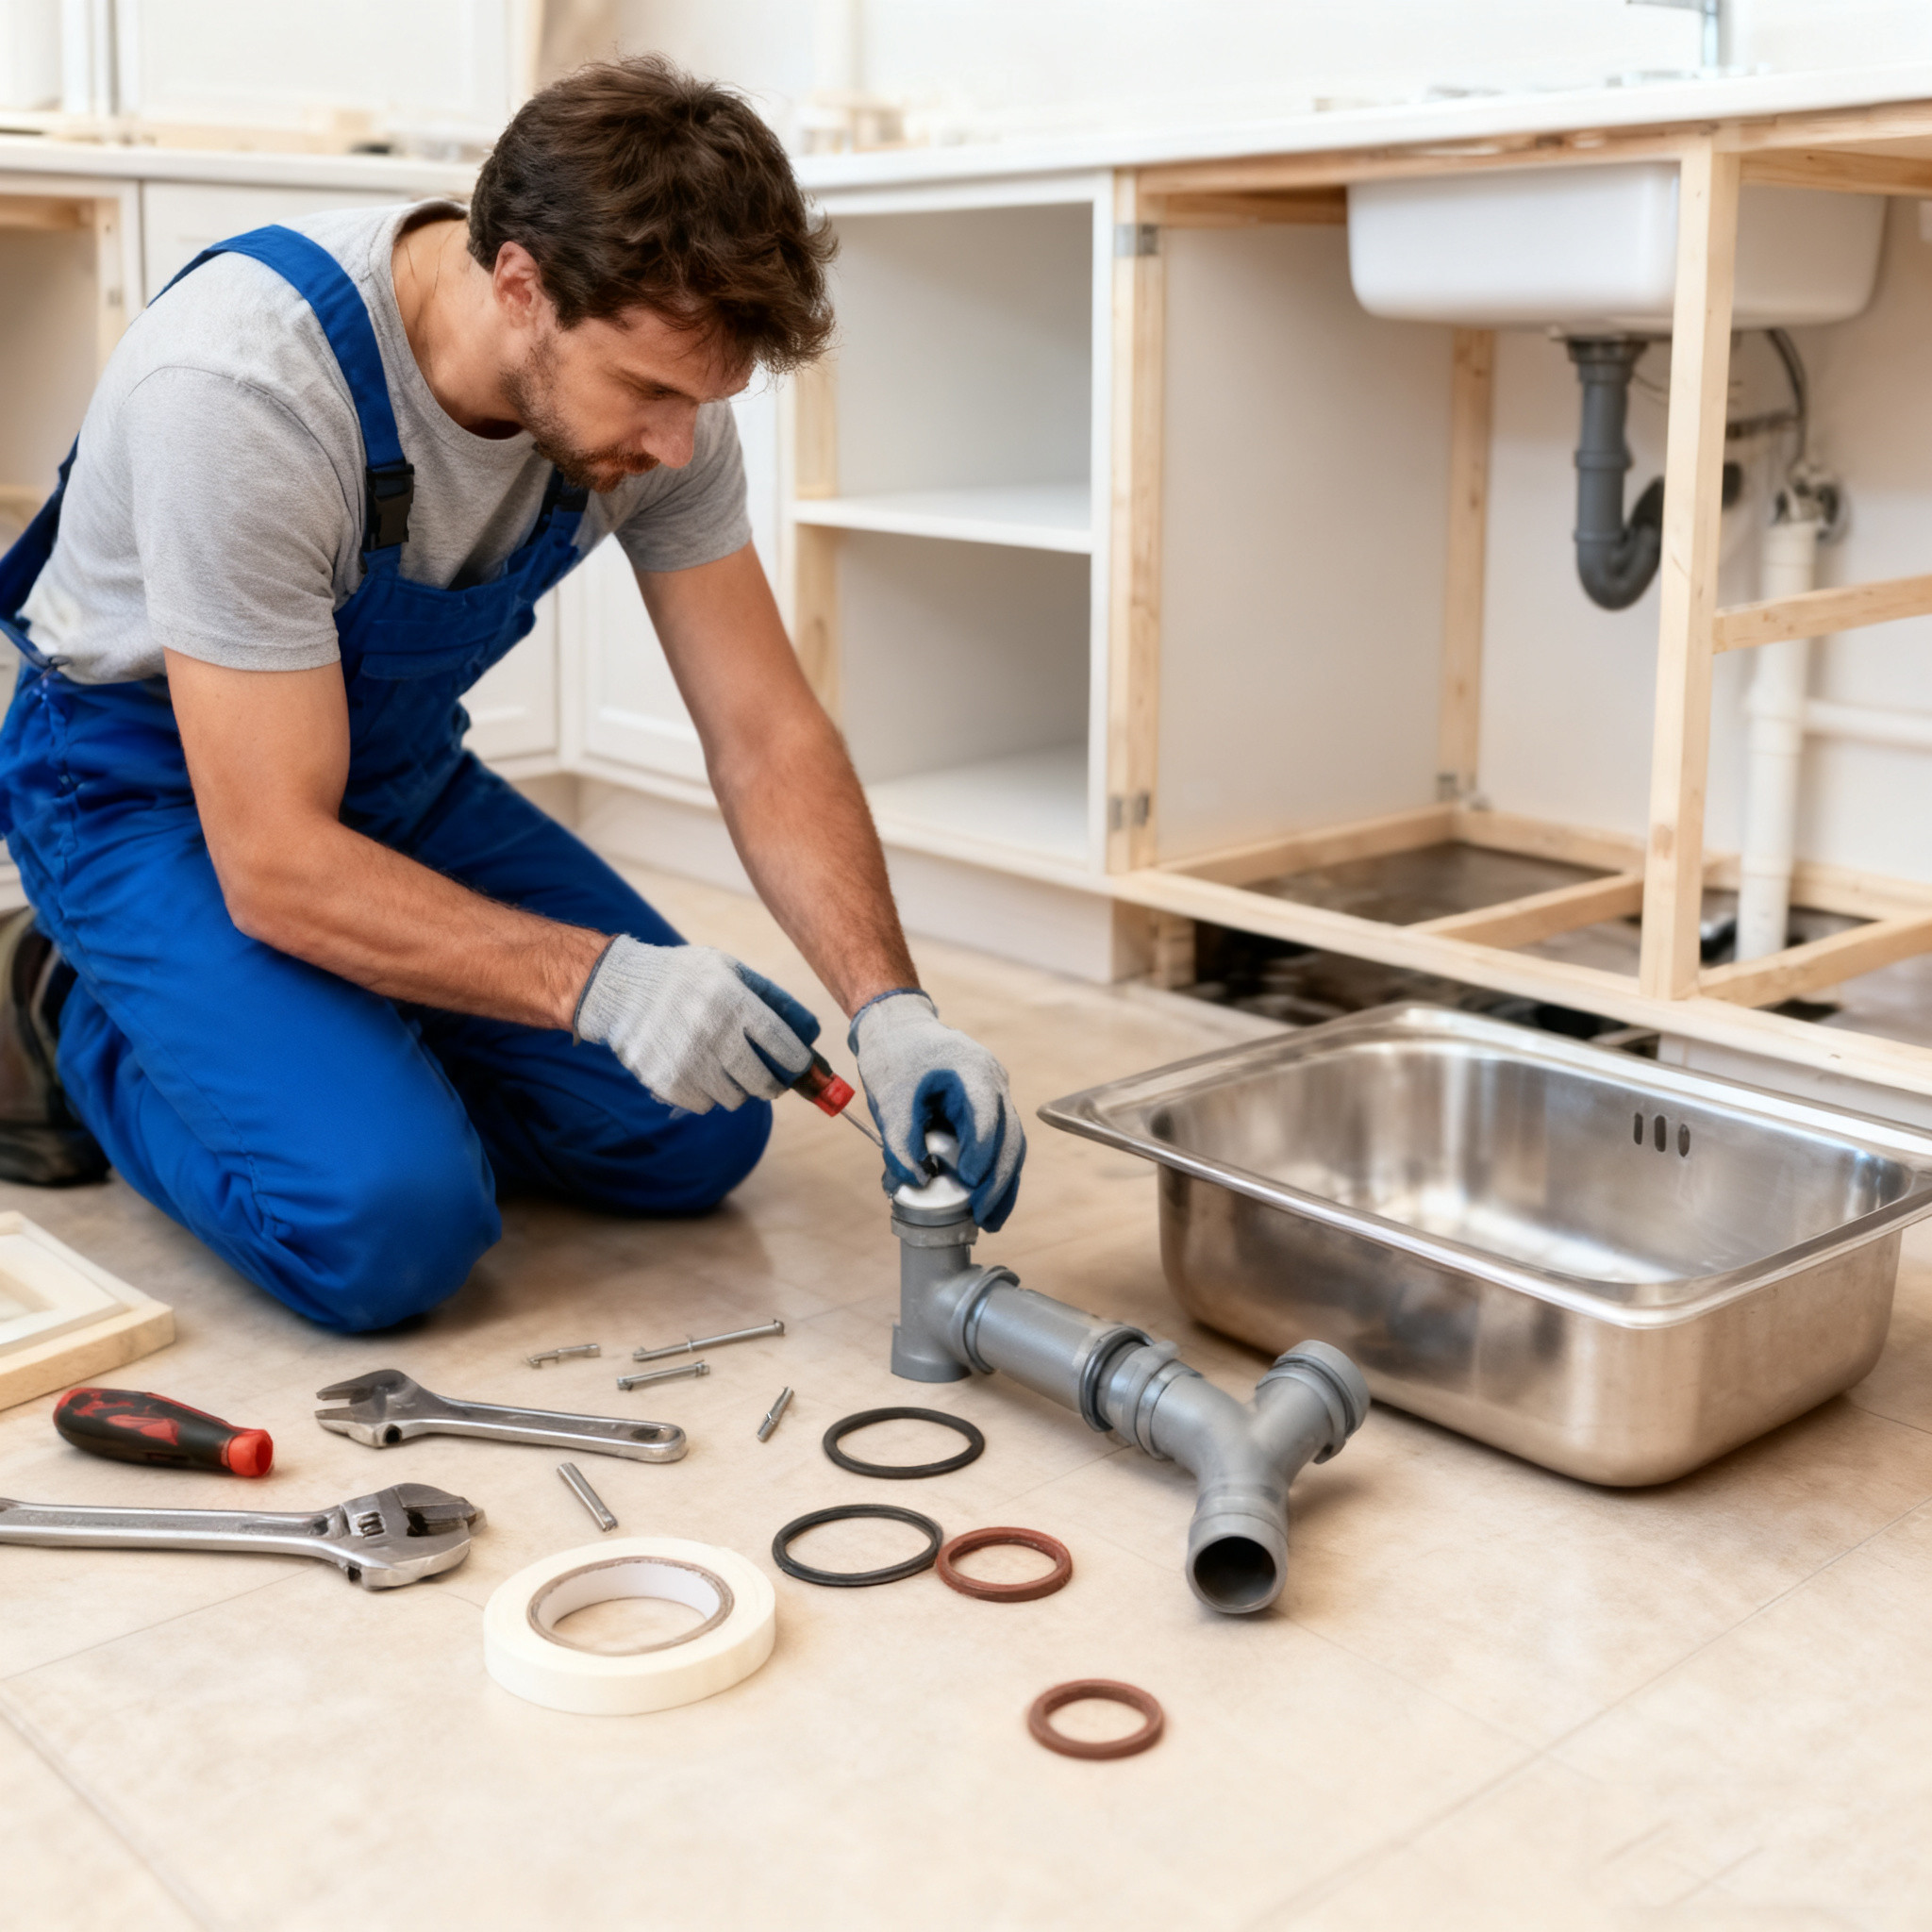
6. Connect the Drain Assembly
-Install the strainer and flange into the sink drain opening.
-Attach the tailpiece and connect it to the P-trap.
-Ensure all connections are tightened and sealed with plumber’s tape where necessary.

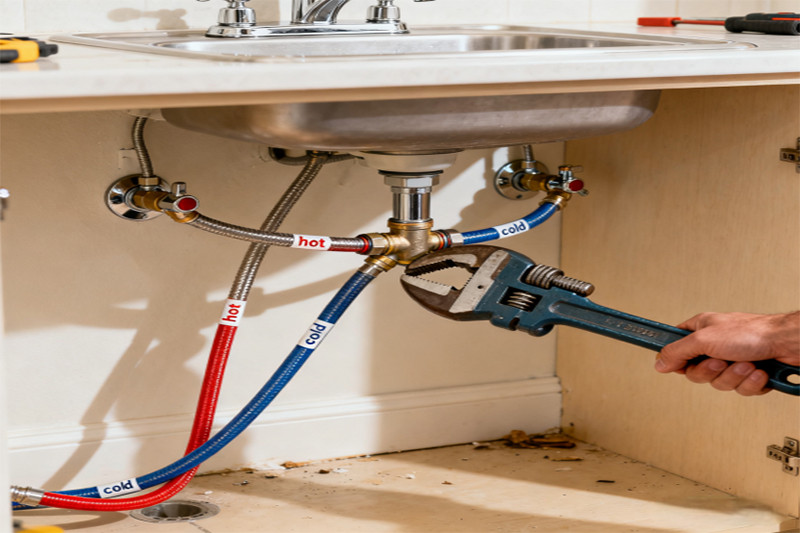
7. Connect Water Supply Lines and Faucet
-Attach the hot and cold water lines to the faucet.
-Connect supply hoses to the shut-off valves.
-Tighten connections with a pipe wrench, avoiding over-tightening.
8. Test for Leaks and Proper Drainage
-Turn on the water supply gradually.
-Check all connections for leaks.
-Run water to verify proper drainage and no water pooling.
9. Final Inspection and Clean-Up
-Ensure the sink is level, secure, and sealed.
-Clean any excess sealant or debris.
-Restore the area to its original condition.
Common Challenges in DIY Stainless Steel Sink Installation and How to Overcome Them
A. Misalignment of Mounting Holes
-Solution: Use a template and a spirit level during marking. Double-check measurements before drilling.
B. Leaking Drain Connections
-Solution: Ensure threads are sealed with Teflon tape and tighten fittings appropriately. Use plumber’s putty if recommended.
C. Inadequate Support or Stability
-Solution: Confirm that mounting brackets are securely fastened and that the support frame (if applicable) is sturdy.
D. Water Supply Line Compatibility Issues
-Solution: Measure existing pipe diameters and connection types. Use adapters if necessary.
E. Difficult Access to Plumbing
-Solution: Plan for easy access points or consider relocating plumbing components during planning.
Maintenance Tips for Longevity and Optimal Performance
When outfitting spaces like laundry rooms, garages, workshops, or commercial utility areas, selecting the right sink is a decision that impacts functionality, durability, and long-term value. Among the many options available, stainless steel utility sinks stand out as a top choice—and for good reason. They combine practicality, resilience, and versatility, making them a go-to solution for both residential and commercial needs. Below’s a detailed look at why stainless steel utility sinks remain a favorite among homeowners, DIY enthusiasts, and professionals alike.
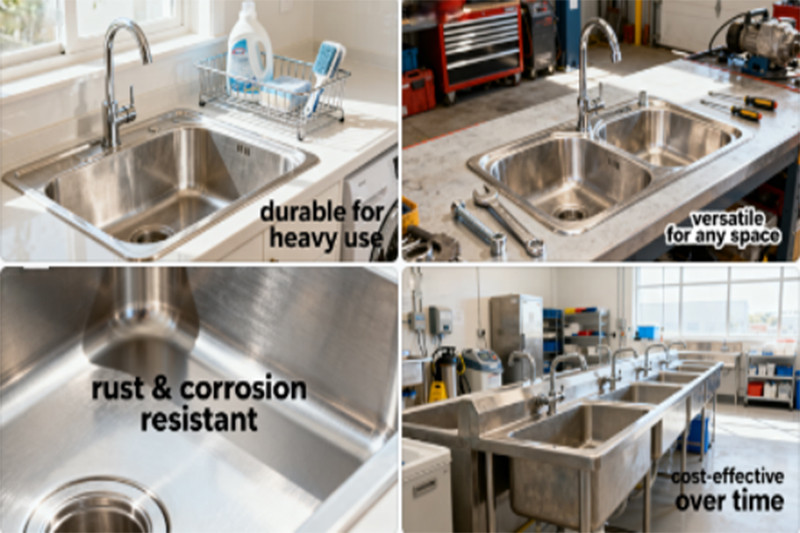
Unmatched Durability for Heavy-Duty Use
Utility sinks are designed to handle far more than standard kitchen or bathroom sinks. From soaking dirty tools and cleaning large outdoor gear to washing pet beds or prepping gardening supplies, they endure constant wear, exposure to harsh substances, and frequent impacts. Stainless steel excels here: it is inherently tough, resistant to dents, scratches, and warping, even under heavy daily use. Unlike porcelain sinks (which chip easily) or plastic models (that crack or fade over time), high-quality stainless steel (typically 18-gauge or thicker) maintains its structural integrity for decades. It can withstand temperature extremes too—from hot water used to sanitize rags to cold water for rinsing, without cracking or discoloration. For spaces that demand a sink built to last, stainless steel is unparalleled.
Hygienic and Easy to Clean
Hygiene is non-negotiable in utility spaces, where sinks often come into contact with dirt, grime, or even mild chemicals. Stainless steel’s non-porous surface is a game-changer: it doesn’t absorb liquids, food particles, or bacteria, preventing the growth of mold, mildew, or germs. Unlike porous materials like concrete or certain composite sinks (which can harbor stains and odors), a quick wipe with soap and water—or a mild disinfectant—is all it takes to keep a stainless steel utility sink clean. This quality is especially valuable for pet owners, gardeners, or anyone using the sink for tasks that involve dirt or organic matter. Plus, stainless steel resists staining from common substances like coffee, oil, or plant sap, ensuring the sink looks fresh even after years of use.
Corrosion and Rust Resistance
Utility sinks are frequently exposed to water, cleaning agents, and even mild corrosives (such as fertilizer residue or automotive fluids in garages). Stainless steel’s unique composition—alloyed with chromium and nickel—creates a protective oxide layer on its surface. This layer acts as a barrier, preventing rust and corrosion from forming, even when the sink is in constant contact with moisture. Unlike iron or galvanized steel sinks (which rust quickly if scratched), stainless steel maintains its smooth, rust-free finish with minimal maintenance. For outdoor utility areas or spaces with high humidity (like laundry rooms), this resistance to corrosion ensures the sink doesn’t degrade over time, saving you from costly replacements.
Versatile Design for Any Space
Stainless steel utility sinks aren’t just functional—they’re also adaptable to a wide range of spaces and styles. They come in various shapes (rectangular, square, deep single-basin) and sizes, from compact models for small garages to extra-large, double-basin designs for commercial workshops. Many also feature additional perks like built-in drainboards, apron fronts, or pedestal bases, making them easy to integrate into existing setups—whether you’re mounting them to a wall, a cabinet, or using them as freestanding units. Aesthetically, stainless steel’s sleek, modern look complements both industrial-style spaces (like workshops) and more polished areas (like laundry rooms with contemporary decor). It also pairs seamlessly with any faucet finish, from chrome to matte black, giving you flexibility to match your space’s design.
Cost-Effective in the Long Run
While stainless steel utility sinks may have a slightly higher upfront cost than plastic or basic porcelain models, they offer exceptional value over time. Their durability means they rarely need replacement—often lasting 15–20 years or more with proper care. This eliminates the frequent repair or replacement expenses associated with cheaper sinks. Additionally, their low maintenance needs (no special cleaners, minimal upkeep) reduce long-term costs. For commercial users, this longevity translates to lower operational costs; for homeowners, it means a one-time investment that serves their needs for decades. Even better, stainless steel is recyclable, making it an eco-friendly choice that reduces waste when it eventually reaches the end of its life.
Compatibility with Modern Plumbing and Accessories
Stainless steel utility sinks are designed to work seamlessly with standard plumbing components, from drain assemblies and P-traps to faucets and sprayers. Their smooth, uniform surfaces make it easy to seal connections with silicone or plumber’s putty, preventing leaks. They also accommodate a range of accessories—like garbage disposals (for residential laundry rooms) or hose attachments (for washing large items)—without requiring extensive modifications. This compatibility simplifies installation (whether DIY or professional) and ensures you can customize the sink to your specific needs, whether you’re adding a soap dispenser or a drying rack.
Conclusion
When it comes to utility sinks, stainless steel checks every box: it’s durable enough for heavy use, hygienic for daily tasks, resistant to rust and corrosion, versatile for any space, and cost-effective over time. Whether you’re upgrading a home laundry room, outfitting a garage workshop, or equipping a commercial utility area, a stainless steel utility sink is a reliable, long-lasting investment that will meet your needs—and exceed your expectations—for years to come. It’s no wonder it remains the preferred choice for anyone who values functionality, durability, and practicality.
Professional Tips for a Flawless DIY Installation
-Always double-check measurements before drilling.
-Use quality tools to avoid damaging components.
-Follow manufacturer instructions meticulously.
-Consider consulting plumbing codes to ensure compliance.
-When in doubt, test connections with water before final sealing.
Conclusion: Achieve a Professional Finish with Expert DIY Techniques
A well-executed DIY installation of your stainless steel utility sink not only saves costs but also provides a sense of accomplishment. By following these detailed steps, precise measurements, and careful attention to detail, you can achieve a professional-grade setup that enhances your space's functionality and aesthetic appeal.
Invest in quality tools, adhere to safety protocols, and don't rush the process. Your stainless steel utility sink will serve you reliably for years, providing a seamless blend of practicality and modern design.
Visual Inspirations and Product Highlights
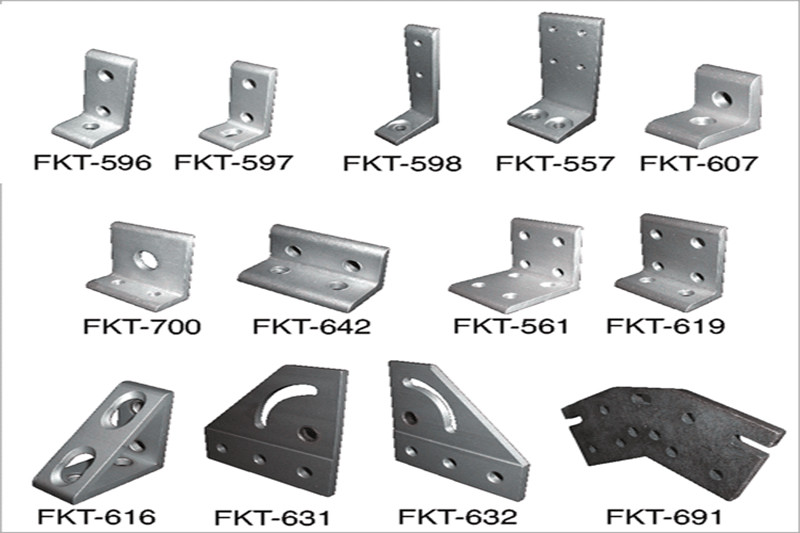
Heavy-duty mounting brackets ready for installation.
Connecting water supply lines to a stainless steel sink.
Embark on your DIY project with confidence, equipped with these expert installation tips, and enjoy the benefits of a durable, stylish, and efficient stainless steel utility sink.