Your Guide to Choosing the Ideal Gauge for a Single Undermount Stainless Steel Sink.
- Share
- Issue Time
- Jul 20,2026
Summary
Choosing the right kitchen sink is a critical decision for any home, greatly impacting daily functionality and kitchen aesthetics. A single undermount stainless steel sink stands out as a top contender, blending sleek design, exceptional durability, and practical benefits. Its undermount installation creates a continuous, unbroken surface with the countertop, offering effortless cleaning by allowing debris to be wiped directly into the bowl, and contributing to a modern, spacious kitchen feel. T
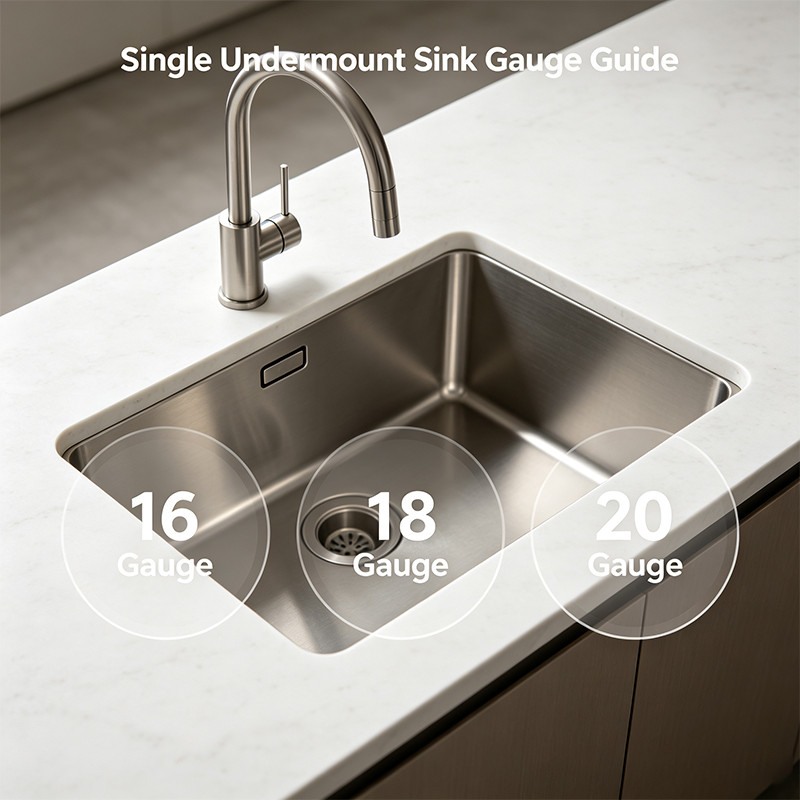
As a home enthusiast, I know that choosing the right kitchen sink is a huge deal—it's often the heart of kitchen activity. It’s where we prep our meals, wash our hands, and clean up after a family feast. When embarking on a kitchen renovation or simply upgrading this crucial component, the sheer number of options can be overwhelming. Join me as we explore why a single undermount stainless steel sink combines style, durability, and practicality, making it a top contender for your space. This type of sink not only offers a sleek, modern aesthetic but also stands up to the rigors of daily use.
This guide will help us understand key features, like the all-important steel gauge, to pick the perfect single undermount stainless steel sink for our kitchen. We'll delve into the nuances of material quality, size, and installation, ensuring you have all the information needed to make a confident and lasting choice. By the end, you'll be empowered to select a sink that not only looks fantastic but also enhances your kitchen's functionality for years to come.
Why I Cherish My Single Undermount Stainless Steel Sink
My affection for the single-bowl undermount stainless steel sink isn't just about looks; it's about a seamless blend of form and function that has genuinely improved my kitchen experience. This fixture has proven its worth time and again, transforming daily chores into simpler, more pleasant tasks. It represents a thoughtful investment in my home's efficiency and style.
The Sleek Charm of an Undermount Design for My Kitchen
The single most defining feature of an undermount sink is its installation. The sink basin is mounted underneath the countertop, creating a continuous, unbroken surface from your counter directly into the sink bowl. This design is the cornerstone of its sleek charm and a major reason it’s favored in modern kitchen designs. There is no raised lip or rim sitting on top of the counter, which is typical of traditional "drop-in" sinks.
This seamless transition offers two significant benefits:
- Effortless Cleaning: One of the most celebrated advantages is the ease of cleanup. You can wipe crumbs, spills, and water directly from the countertop into the sink without any obstruction. A traditional sink's rim inevitably traps grime and requires careful cleaning, but the undermount design eliminates this crevice entirely, promoting better hygiene.
- Enhanced Aesthetic and Space: The uninterrupted countertop line creates a clean, minimalist, and sophisticated look. It makes the entire kitchen feel more spacious and streamlined. By eliminating the sink's rim, you also gain a small amount of usable counter space right up to the edge of the sink, which can be surprisingly valuable in smaller kitchens or busy prep areas.
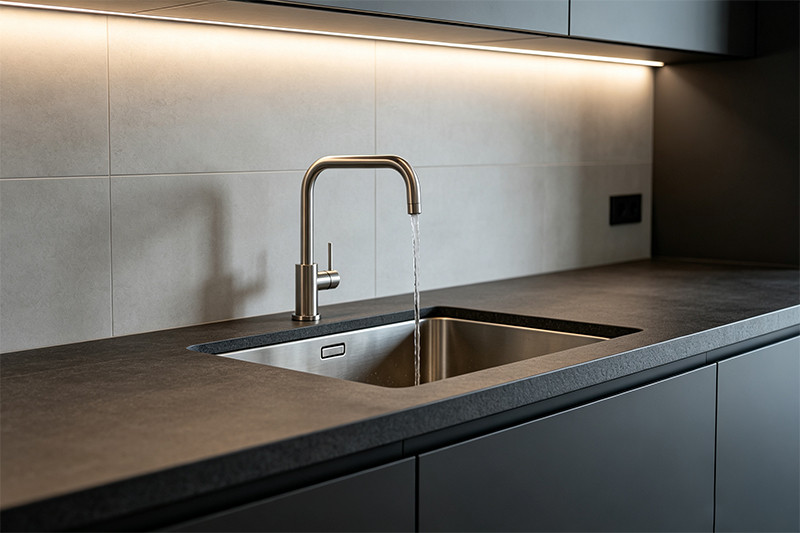
This design choice elevates the entire kitchen, making it feel more integrated and thoughtfully designed. The faucet can even be installed on the countertop or the wall behind the sink, allowing for more customization and a unique, high-end look.
Stainless Steel: A Champion for Durability and Versatile Style
While the undermount style provides the form, stainless steel provides the function. It remains one of the most popular materials for kitchen sinks for a host of compelling reasons. Its reputation as a workhorse is well-earned.
Key attributes of stainless steel include:
- Exceptional Durability: High-quality stainless steel resists chipping, cracking, and staining. It can withstand the daily rigors of a busy kitchen, from dropped utensils to heavy cast-iron pans.
- Heat Resistance: You can pour boiling water from a pasta pot directly into the sink without worrying about damage. This thermal resistance is a significant advantage over many other materials.
- Hygienic Surface: Stainless steel is non-porous, meaning it doesn't harbor bacteria or germs when properly cleaned. This makes it an excellent choice for a food preparation area, ensuring a safer, more sanitary environment.
- Versatile Aesthetic: The neutral, sleek appearance of stainless steel complements nearly any kitchen decor, from ultra-modern to traditional farmhouse. It pairs beautifully with all countertop materials, including granite, quartz, and butcher block, and matches the finish of many appliances.
- Longevity: A well-cared-for, high-quality stainless steel sink can last for many decades, making it a sound long-term investment for your home.
This combination of strength, hygiene, and timeless style makes stainless steel a champion material, ensuring your sink is not just a pretty face but a lasting and practical centerpiece.
The Spacious Advantage of a Single Bowl Configuration in My Home
The choice between a single and double bowl sink is a significant one, and for my home, the single bowl wins by a landslide. The "spacious advantage" isn't an exaggeration; it's a practical benefit I appreciate every day. A single bowl sink features one large, uninterrupted basin without a divider.
This design offers several key advantages:
- Accommodates Large Items: This is the most significant benefit. Washing large pots, stockpots, baking sheets, and roasting pans becomes incredibly easy. In a double bowl sink, these items often don't fit flat, leading to awkward maneuvering and splashing. With a single bowl, you can lay them down for a proper soak and scrub.
- Maximizes Usable Space in a Smaller Footprint: A 30-inch single bowl sink provides a much larger continuous workspace than a 30-inch double bowl sink, where the space is broken up by a divider. This makes it a great choice for smaller kitchens where cabinet and counter space are at a premium.
- Simpler Cleaning and Maintenance: With fewer corners and no central divider, cleaning a single bowl sink is generally faster and easier. There are fewer places for food particles and grime to get trapped.
- Modern, Streamlined Look: The single basin design contributes to a clean, minimalist aesthetic that is highly popular in contemporary kitchens. It offers a simple and uncluttered look.
For those who primarily use a dishwasher for daily dishes and need a sink mainly for washing large items and food prep, the open, flexible space of a single bowl is unbeatable.
Key Takeaways
Choosing the right kitchen sink is a crucial decision that impacts daily functionality and long-term satisfaction. To simplify the process, here are the essential points to remember when selecting a single undermount stainless steel sink:
- Embrace the Undermount Design: This installation creates a seamless, modern look and makes countertop cleanup effortless by allowing you to wipe debris directly into the sink. It's a stylish and hygienic choice.
- Prioritize High-Quality Stainless Steel: Opt for Type 304 stainless steel with an 18/8 chromium-to-nickel ratio. This material offers superior resistance to rust, corrosion, heat, and stains, ensuring your sink remains durable and beautiful for decades.
- Understand Sink Gauge: The gauge indicates the thickness of the steel—a lower number means thicker steel. A 16 or 18-gauge sink is highly recommended for residential kitchens as it provides better dent resistance and sound-dampening qualities.
- Leverage the Single Bowl Advantage: A single, large basin provides ample, uninterrupted space perfect for washing bulky items like stockpots, baking sheets, and large pans, something a divided double bowl struggles with.
- Balance Budget with Quality: While thicker gauge, higher-quality sinks may have a higher upfront cost, they represent a better long-term investment due to their enhanced durability and longevity. A quality brand like Samsink ensures you are getting a product built to last.
- Ensure Countertop Compatibility: Undermount sinks require solid-surface countertops like quartz, granite, or marble that can be properly sealed and can support the weight of the sink. They are generally not compatible with laminate countertops.
- Plan for Professional Installation: To ensure a perfect fit, a waterproof seal, and secure mounting, professional installation is strongly recommended for undermount sinks. This protects your investment and prevents costly issues like leaks.
By focusing on these key features—design, material, thickness, and configuration—you can confidently choose a sink that will be a functional and elegant cornerstone of your kitchen for years to come.
Deciphering Features for Your Ideal Single Undermount Stainless Steel Sink
Once you've settled on the single-bowl undermount style, the next step is to dive into the specifications. Understanding the technical details is what separates a good choice from the perfect choice. Features like gauge, steel grade, and dimensions will directly impact your sink's performance, durability, and daily usability. Let's break down these critical elements.
Understanding Sink Gauge: Why Thicker is Often Better for My Sink
The term "gauge" refers to the thickness of the stainless steel. It's one of the most critical factors in determining a sink's quality and performance. Counterintuitively, the lower the gauge number, the thicker the steel. For household kitchen sinks, the gauge typically ranges from 22 (thinnest) to 16 (thickest).
So why does thicker steel matter?
- Dent and Damage Resistance: A thicker gauge, such as 16-gauge (approx. 1.5mm thick), is significantly more resistant to denting and bowing than a thinner 22-gauge sink. In a high-traffic kitchen where heavy pots and pans are common, this added durability is crucial for maintaining the sink's appearance and structural integrity over time.
- Noise Reduction: Thicker steel absorbs vibrations better. This means less noise from running water, clanging dishes, and the operation of a garbage disposal. A lower-gauge sink produces a dull thud rather than a loud, tinny clang, contributing to a quieter kitchen environment. Many high-quality sinks also come with sound-dampening pads and undercoating, but starting with thicker steel provides a natural advantage.
- Stability and Feel: A 16 or 18-gauge sink feels more solid and substantial. It's less prone to flexing under the weight of water or heavy cookware, providing a sense of high-quality construction.
For most residential kitchens, 18-gauge is a popular and excellent middle ground, offering a great balance of durability and affordability. However, for those who want the best in terms of performance and longevity, a 16-gauge sink is the premium choice. Thinner gauges (20 or 22) are more common in budget-friendly or lower-end sinks and are more susceptible to damage and noise.
Gauge Comparison Table
| Gauge | Thickness (approx.) | Performance Characteristics | Best For |
|---|---|---|---|
| 16-Gauge | 1.5 mm | Highest dent resistance, quietest operation, most durable. | Heavy-use kitchens, homeowners wanting premium quality. |
| 18-Gauge | 1.2 mm | Excellent durability and noise reduction, great value. | The standard for most quality residential kitchens. |
| 20-Gauge | 1.0 mm | Prone to more noise and potential denting. | Light-use kitchens, laundry rooms, or budget remodels. |
| 22-Gauge | 0.8 mm | Thinnest option, noisy, and susceptible to damage. | Basic applications, not recommended for a primary kitchen sink. |
Investing in a lower-gauge sink from a reputable brand like Samsink is a wise decision for a fixture you'll use every single day.
The Excellence of High-Grade Stainless Steel (Type 304) for Longevity
Not all stainless steel is created equal. While gauge speaks to thickness, the grade of the steel determines its composition and, most importantly, its resistance to rust and corrosion. For kitchen sinks, the gold standard is Type 304 stainless steel.
Type 304 is a specific grade of austenitic stainless steel that is prized for its durability and longevity. Its excellence comes from its chemical makeup:
- 18% Chromium: This is the key element for corrosion resistance. When exposed to oxygen, the chromium forms a thin, invisible, and passive layer of chromium oxide on the steel's surface. This layer acts as a protective shield, preventing rust and stains from forming. If the surface gets scratched, this protective layer quickly reforms, effectively "healing" itself.
- 8% Nickel: Nickel enhances the steel's overall performance. It increases toughness, improves resistance to acids found in common foods, and contributes to the steel's lustrous, bright appearance.
This specific composition is often referred to as 18/8 stainless steel. When you see this designation, you can be confident you are getting high-quality Type 304 steel.
Cheaper sinks may use lower grades, such as Type 202 or 430. These grades contain less nickel, replacing it with more affordable elements like manganese. While they may look similar initially, they are far more susceptible to rust, pitting, and staining, especially in a moist kitchen environment. Choosing a sink made from certified Type 304 stainless steel is a critical investment in the long-term beauty and function of your kitchen. It ensures your sink will withstand daily use and exposure to water and cleaning agents without degrading.
Finding the Right Size and Depth for My Single Undermount Stainless Steel Sink Needs
Once you know the quality of steel you want, you must ensure the sink physically fits your space and meets your functional needs. This comes down to three measurements: width, front-to-back length, and depth.
1. Sink Width and Your Cabinet
The most critical factor for sink size is the width of your base cabinet. As a rule of thumb, the sink's overall width should be at least 3 inches narrower than the interior width of your sink base cabinet. This leaves enough room on each side for the mounting clips and proper installation.
- To find the right sink, measure the inside of your base cabinet, from left to right.
- Subtract at least 3 inches from that measurement. This is the maximum sink width you should consider.
- Example: For a standard 36-inch base cabinet, you should look for sinks that are 33 inches wide or less. For a 30-inch cabinet, your maximum sink width would be 27 inches.
Standard Kitchen Sink Sizes (Width):
- Small: 23-25 inches (for cabinets 27 inches or wider)
- Medium/Standard: 30 inches (for cabinets 33 inches or wider)
- Large: 33 inches (for cabinets 36 inches or wider)
2. Sink Depth (The Ergonomic Factor)
Sink depth is measured from the top rim to the bottom of the basin. Standard kitchen sinks typically range from 8 to 10 inches deep.
- Deeper Sinks (9-10 inches): These are excellent for hiding dirty dishes and containing splashes, especially when washing large pots and pans. A 10-inch deep sink offers maximum capacity, which is a major draw for many homeowners.
- Shallower Sinks (8 inches): These can be more ergonomic, especially for taller individuals or those who experience back pain. A shallower basin means less bending over to reach the bottom of the sink. An 8-inch depth still provides ample space for most daily tasks.
Important Consideration for Undermount Sinks: Remember that an undermount sink is installed below the countertop. This means the effective depth you experience is the sink depth plus the thickness of your countertop (typically 1.25 inches for granite or quartz). An 8-inch undermount sink can feel like a 9.25-inch deep sink in practice. A 10-inch sink can feel very deep, which might be a pro or a con depending on your height and preference. For most people, a 9-inch deep sink offers the perfect balance between capacity and comfort.
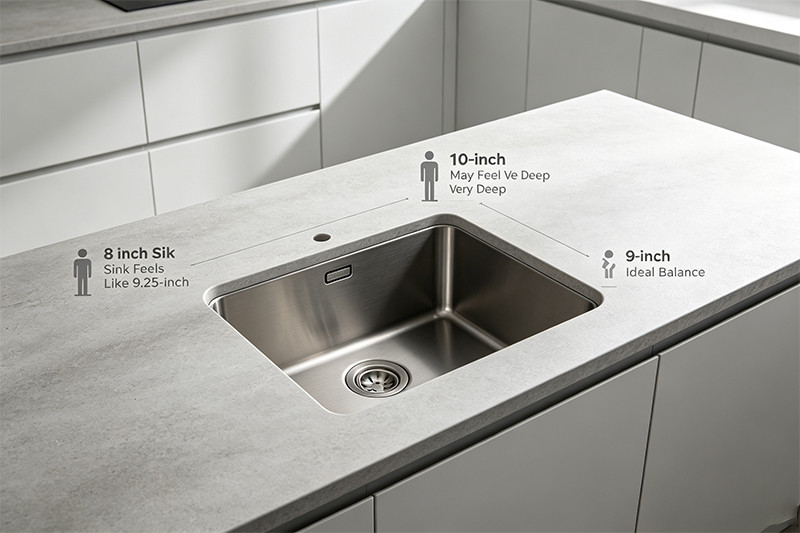
Before making a final decision, consider your height, how you use your sink, and the thickness of your planned countertop. This will ensure you choose a size that is not only spacious but also comfortable for you to use every day.
Smart Choices: Practical Considerations for My Single Undermount Stainless Steel Sink
Beyond the technical specifications, a few practical considerations will ensure your new sink is a perfect match for your kitchen and lifestyle. Thinking about budget, countertop compatibility, and long-term maintenance from the start will save you from potential headaches and help you fully enjoy your investment. These smart choices bridge the gap between a sink that looks good on paper and one that works beautifully in your home.
Balancing Budget with the Long-Term Value of My Sink
The kitchen sink is one of the most-used fixtures in your home, so viewing it as a long-term investment rather than a simple purchase is essential. While budget is always a consideration, focusing solely on the lowest price can lead to higher costs down the road in the form of replacements, repairs, and frustration.
Here's how to think about the balance:
- Upfront Cost vs. Lifespan: A basic, thinner gauge (20-22 gauge) sink will be the most affordable option initially. However, it is also more prone to denting, scratching, and noise. A higher-quality, thicker gauge (16 or 18 gauge) sink costs more upfront but is built to withstand daily abuse for 15, 20, or even 30 years. The cost of replacing a cheap sink, which often involves hiring a plumber and potentially disrupting your countertop, can easily exceed the initial savings.
- The Value of Durability: A durable sink is a practical asset. It resists damage from heavy cookware, tolerates high heat, and is less likely to show wear and tear. This resilience means you spend less time worrying about damage and more time enjoying a sink that looks and performs like new. Investing in a sink from a trusted brand like Samsink ensures you’re getting a product made with high-quality materials and manufacturing standards.
- Resale Value: A high-quality, modern undermount sink is an attractive feature to potential home buyers. It signals a well-maintained and thoughtfully updated kitchen, which can contribute positively to your home's overall value. A cheap, worn-out sink, on the other hand, can be seen as a project that the new owner will have to tackle.
Ultimately, the best value comes from buying a sink that you won't have to replace. By prioritizing quality materials (Type 304 steel) and robust construction (16 or 18 gauge), you are making a smart financial decision that pays dividends in performance and peace of mind for years to come.
Ensuring Compatibility with My Chosen Countertop Material
The sleek, seamless design of an undermount sink is one of its greatest assets, but this installation method has specific requirements for the countertop material. Not all countertops are created equal when it comes to supporting an undermount sink.
Ideal Countertop Materials:
The key requirement is a solid, non-porous, and water-resistant material. The edge of the countertop around the sink cutout will be exposed, so it must be able to handle moisture without swelling, warping, or degrading. Furthermore, the countertop must be strong enough to support the weight of the sink, especially when it's full of water and dishes.
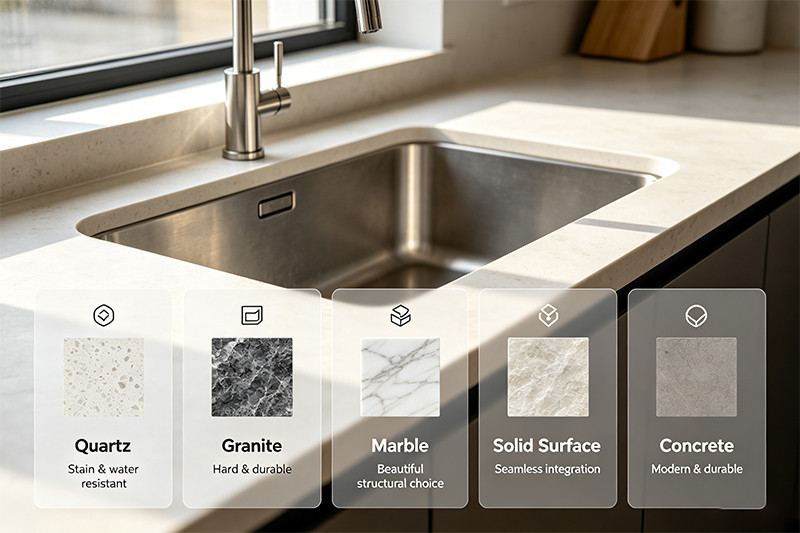
For these reasons, the best choices for an undermount sink are:
- Quartz: An engineered stone that is non-porous, durable, and highly resistant to stains and water. It provides a perfect, solid surface for mounting.
- Granite: A natural stone that is incredibly hard and durable. When properly sealed, it is highly resistant to water and can easily support the weight of an undermount sink.
- Marble: Another natural stone known for its beauty. Like granite, it requires sealing to prevent staining and water damage but is an excellent structural choice.
- Solid Surface (e.g., Corian): These materials are non-porous and can even be fused with an integrated sink of the same material for a truly seamless look.
- Concrete: When sealed correctly, concrete countertops are durable and water-resistant, making them a suitable modern option for undermount sinks.
Countertops to Avoid for Undermount Sinks:
- Laminate: Standard laminate countertops are not suitable for undermount sinks. Their core is made of particleboard, which will swell and disintegrate if exposed to moisture at the sink cutout edge.
- Tile: While the tile itself is water-resistant, the grout lines create a weak point. It is very difficult to create a perfect, waterproof seal around a tile edge, making it a poor choice for supporting an undermount sink.
While some specialty products and installation methods claim to allow undermount sinks with laminate, these are not standard practice and can be risky. For a guaranteed, long-lasting, and waterproof installation, it is crucial to pair your undermount sink with a solid surface countertop.
Simple Maintenance for My Ever-Shiny Stainless Steel Sink
One of the best features of a stainless steel sink is how easy it is to maintain. With a few simple habits, you can keep your sink looking brilliant and new for years. The key is regular, gentle cleaning and knowing what to avoid.
Daily Care Routine:
- Rinse and Wipe: The single most effective habit is to rinse the sink with water and wipe it dry with a soft cloth after each use. This prevents food particles from drying onto the surface and stops mineral deposits from tap water from forming water spots.
- Use Mild Soap: For daily cleaning, all you need is a soft sponge or cloth and a bit of dish soap.
- Clean with the Grain: Stainless steel has a faint "grain" or finish lines. Always scrub and wipe in the direction of these lines. This helps prevent micro-scratches and maintains the original luster.
Weekly or Deep Cleaning: For a more thorough cleaning to remove any buildup or light stains, you can use common household items:
- Sprinkle the damp sink with baking soda.
- Using a soft sponge or cloth, gently scrub the entire surface, following the grain. Baking soda is a mild abrasive that cleans effectively without scratching.
- For extra cleaning power and to sanitize, you can spray white vinegar over the baking soda, let it fizz for a few moments, and then scrub.
- Rinse the sink thoroughly with water and wipe it completely dry with a microfiber cloth to prevent streaks and restore shine.
How to Prevent and Manage Scratches:
- Use a Sink Grid: The best way to prevent scratches from pots, pans, and utensils is to use a stainless steel bottom grid. A grid elevates dishes off the sink's surface, acting as a protective barrier.
- Avoid Harsh Abrasives: Never use steel wool, scouring powders, or abrasive brushes. These will damage the finish and create deep scratches.
- Rinse Away Harsh Chemicals: Do not let household cleaners containing chlorine bleach or other harsh chemicals sit in your sink. If they do come into contact, rinse the surface immediately and thoroughly.
- Embrace the Patina: Over time, a stainless steel sink will develop a "patina" of very fine, hairline scratches that blend together to create a soft, uniform satin finish. This is a natural characteristic of the material.
By following these simple steps, you can easily maintain the beauty and functionality of your stainless steel sink, ensuring it remains an ever-shiny centerpiece in your kitchen.
Installing Your Single Undermount Stainless Steel Sink with Confidence
The final step in bringing your new sink into your kitchen is the installation. For an undermount sink, this process is more technical than for a traditional drop-in model. A flawless installation is critical not only for the sink's appearance but also for its long-term stability and functionality. Understanding the process and the value of professional expertise will give you the confidence that the job is done right.
Why Professional Installation Benefits My Undermount Sink Project
While it may be tempting to take on the installation of a new sink as a DIY project, the specific demands of an undermount model make professional installation a wise and highly recommended investment. Unlike a drop-in sink that is simply lowered into place, an undermount sink requires precision, strength, and expertise to avoid costly mistakes.
Here’s why hiring a professional is so beneficial:
- Precise Countertop Cutout: The hole in the countertop must be perfectly cut and polished to match the dimensions of the sink. An improper cut can lead to an uneven reveal, gaps, or even damage to the expensive countertop material itself. Professionals have the specialized tools and experience to get this right.
- Secure Mounting and Support: An undermount sink hangs entirely from the bottom of the countertop. A professional installer will use a combination of high-strength epoxy adhesives and mechanical supports like clips or brackets to ensure the sink is securely attached. This is crucial to support the weight of the sink, a full basin of water, and heavy dishes without sagging or, in the worst-case scenario, falling. Improper support is one of the most common reasons for undermount sink failure.
- Waterproof Sealing: A perfectly waterproof seal between the sink's rim and the underside of the countertop is non-negotiable. Professionals use high-quality silicone caulk to create this seal, preventing water from seeping into the cabinet below, which can cause mold, mildew, and structural damage to the cabinetry.
- Plumbing and Faucet Installation: A professional can also handle the connection of the drain, garbage disposal, and faucet, ensuring everything is leak-free and functions correctly. This avoids the common DIY pitfalls of cross-threaded pipes or improper drain alignment.
- Warranty Protection: Many sink and countertop manufacturers may void their warranties if the product is not installed by a licensed professional. Investing in professional installation protects your investment and ensures you are covered in case of a product defect.
In short, the cost of professional installation is minor compared to the potential cost of repairing a damaged countertop, water-logged cabinets, or a failed sink. It provides peace of mind that the centerpiece of your kitchen is beautiful, functional, and securely installed for the long haul.
What I Should Anticipate During the Installation of My New Sink
Knowing what a professional installer will do can help you prepare for the process and ensure everything goes smoothly. The installation of an undermount sink is a multi-step procedure that requires precision and patience. The entire process typically takes a few hours, not including the curing time for adhesives.
Here is a general step-by-step breakdown of what you can expect during a professional installation:
- Preparation and Site Inspection: The first step is to prepare the work area. This involves clearing out the base cabinet completely and ensuring the space is clean. The installers will shut off the water supply lines and disconnect the plumbing from your old sink if one is being replaced. They will inspect the countertop and cabinet to confirm everything is ready for the new installation.
- Countertop Cutout: If you are getting new countertops, they will arrive with a pre-cut hole based on the template provided with your sink. If you are fitting a sink into existing countertops, this is when the precise and dusty work of cutting the stone happens.
- Test Fit and Faucet Installation: The installers will do a "dry fit" by lifting the sink into position to ensure it aligns perfectly with the cutout. It's much easier to install the faucet and drain assembly onto the sink before it is permanently mounted under the counter. The installer will do this now.
- Applying Adhesive and Mounting the Sink: The underside of the countertop around the cutout will be thoroughly cleaned. A bead of 100% silicone sealant is applied to the top rim of the sink. The sink is then carefully lifted into position and pressed firmly against the underside of the countertop.
- Securing the Sink: This is a crucial step. The installer will use bar clamps and bracing to hold the sink tightly in place while the initial adhesive sets. Then, they will attach the mounting clips that came with the sink, screwing them into the underside of the countertop to provide mechanical support. These clips are tightened evenly to distribute the pressure and create a secure bond.
- Cleanup and Curing: Any excess silicone that squeezed out will be wiped away for a clean finish. At this point, the most important part begins: waiting. The silicone adhesive needs to cure, which typically takes at least 24 hours. The sink should not be used, and no weight should be placed in it during this time.
- Final Plumbing Connections: After the adhesive has fully cured, the plumber will return to connect the P-trap to the drain and hook up the hot and cold water supply lines to the faucet. They will also connect the dishwasher drain line and garbage disposal, if applicable.
- Testing for Leaks: Once everything is connected, the installer will turn the water back on and thoroughly test all connections—faucet, drain, and disposal—to ensure there are no leaks.
By anticipating these steps, you can coordinate with your installer and be prepared for the temporary downtime in your kitchen while the sink is being expertly and securely set in place.
Frequently Asked Questions (FAQ)
To help you feel even more confident in your decision, here are answers to some of the most common questions about single undermount stainless steel sinks.
What is the best gauge for a kitchen sink?
The best gauge depends on a balance of durability, performance, and budget. For most residential kitchens, 18-gauge stainless steel is considered the industry standard and an excellent choice, offering significant durability and sound resistance. For those seeking the highest level of performance and dent resistance, especially in a very busy kitchen, 16-gauge is the premium, thicker option and a worthwhile upgrade. Gauges higher than 18 (like 20 or 22) are thinner and more prone to noise and denting, making them less ideal for a primary kitchen sink.
Can I install an undermount sink on my existing countertop?
This depends entirely on your current countertop material. Undermount sinks require a solid-surface material like quartz, granite, marble, or concrete because the material itself must be water-resistant and strong enough to support the sink. If you have existing laminate or tile countertops, you generally cannot install an undermount sink without replacing the countertops, as these materials will be damaged by the exposed, unsealed edge and lack the structural integrity for proper mounting.
How do I prevent my stainless steel sink from scratching?
While no stainless steel sink is completely scratch-proof, you can easily minimize scratches. The single best method is to use a stainless steel basin rack or bottom grid. This elevates dishes and utensils, preventing them from scraping against the sink's surface. Additionally, always clean with a soft cloth or sponge (never steel wool or abrasive pads) and wipe in the direction of the steel's grain. Over time, your sink will develop a natural patina of fine lines that blend together, which is characteristic of the material.
Is a single bowl sink better than a double bowl?
Whether a single or double bowl is "better" is a matter of personal preference and how you use your sink. A single bowl sink excels at providing a large, uninterrupted space, making it ideal for washing large items like stockpots, baking sheets, and oven racks. It's often preferred by those who use a dishwasher for most of their dishes. A double bowl sink is great for multitasking—for example, soaking dishes in one bowl while prepping food or rinsing in the other. Consider your cooking and cleaning habits to decide which configuration best fits your lifestyle.
What does the 18/8 or 304 grade mean for a stainless steel sink?
This refers to the chemical composition and quality of the steel. Type 304 is the industry standard for high-quality kitchen sinks. The numbers 18/8 indicate that the steel is made of 18% chromium and 8% nickel. The chromium provides excellent rust and corrosion resistance by forming a protective layer on the steel's surface, while the nickel enhances durability, acid resistance, and gives the sink its lasting shine. Always look for a sink made of Type 304 or 18/8 stainless steel to ensure longevity.
Conclusion
Ultimately, selecting a single undermount stainless steel sink means investing in your kitchen's functionality and aesthetic for years to come. This is more than just choosing a utility; it's about selecting the hard-working centerpiece of your culinary space. From its sleek, seamless integration with your countertop to its proven durability against the demands of daily life, this type of sink offers a powerful combination of style and substance.
By focusing on material quality (insisting on Type 304 steel), choosing the optimal gauge for your needs (16 or 18-gauge for the best performance), and ensuring a proper, professional installation, I’m confident we can all make a wise choice that meets our needs. These elements work together to create a sink that is not only beautiful but also resilient, quiet, and a joy to use. For a sink that embodies all these qualities, consider exploring the collection from Samsink, a brand dedicated to quality and lasting design.